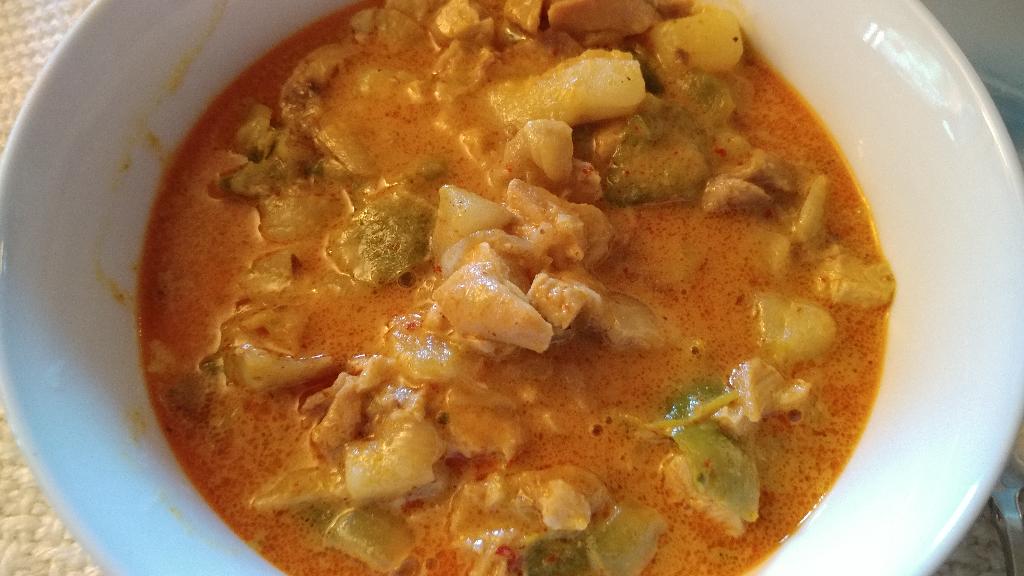
A finished huge bowl of yellow curry made with Maesri yellow (Karee) curry paste. Oh boy, it was good.
I like to cook, and I like it even more when I can eat efficiently and cheaply! I'm sharing some of my best tips for shopping, cooking, and preserving food efficiently, as well as dropping the occasional food science!
I often constrain myself to eating for less than $2.50 per day, and this page contains some of my favorite foods and techniques for making incredibly delicious but inexpensive food.
I started this blog before the pandemic, but have updated some parts based on what I've learned from making food during the pandemic. Many people are food-weary from having to plan trips to the grocery store less often and having to plan and cook more and not being able to just go grab the items they need. I definitely understand this. I used to go to the grocery store once or twice a week. It was my happy place. I like to leisurely look at everything and find good deals and get what is on sale that week, and find new ideas. During the pandemic, going to the grocery store is a military operation in which I have to mask- and glove-up and plan my exact shopping strategy by aisle, knowing if I forget something, I won't be back for 30 or 40 days. One time I forgot to get eggs and I was heartbroken when I got home and realized it. It's so much harder. I get it.
I love food and I love to cook. I love to study the science of cooking. I'm very lucky—I'm not in a position that I have to strongly limit my food expenses, but I have always enjoyed finding ways of making delicious food inexpensively, and to turn cheap ingredients into something wonderful.
This blog is my attempt to share some of the things I've tried and learned, including cooking techniques, the science of cooking, how to reduce food costs, and how to make use of inexpensive ingredients.
You may have seen my former blog, Engineer Eats Efficiently (on $2.50 a day). For many years during Lent, I have attempted to eat for no more than $2.50 a day. One year, I wrote up each day's meals and many recipes on that blog, but I haven't written up other years (often because I make a lot of the same foods as I made that year.) Go read it, especially the Conclusions section.
Since I wrote up that blog, I have tried new recipes that I love, learned new techniques that I'd like to share, and found ways to save money while shopping. I missed writing about great inexpensive meals that I've made, and wanted to start again in a different format.
It has become a year-round pattern for me to try and eat inexpensively. When certain food products are on deep sales, I try to find ways of cooking with them or preserving them.
I have to admit that this year's cooking has been some of the best and cheapest that I've ever done. My meals have been delicious and I've been eating very well indeed. I wanted to share some of that excitement I get from making a really delicious meal that just happens to be amazingly inexpensive!
For many years, I've scoured grocery stores to find the most inexpensive meat. I've tried cheap bologna, strange packs of Salisbury steaks, organ meats, hot dogs made of various meats ground together, and many other things. Consistently, though, the cheapest meat is one of the very best and most versatile and easiest to obtain: chicken thighs!
About every other week, my local supermarkets will have chicken thighs on deep discount ($0.97 dollars / pound is quite typical!) When you see these prices, buy some chicken thighs and freeze them! (I always make sure to separate them into packs of 4 or 5 thighs so they don't all freeze together into one big lump.)
Chicken thighs are mostly meat. There's one little bone in them. In my tests, the bone makes up about 4.8% of the weight of the thigh. Compare this to a drumstick, which has about 14% of its weight in its much larger bone.
Chicken thighs are moist, meaty, and cook up well. The benefit of cooking with only one part of the chicken is that everything cooks at the same rate. And thighs are the best part of the chicken!
One of the most life-changing dishes I learned to make when eating on $2.50 a day was HOT CHICKEN! If you aren't afraid of making fried chicken, try this!
I'm going to give you a recipe for cooking chicken thighs. And it's more than just a recipe. It's now my favorite technique for cooking chicken dishes! It's nearly foolproof. It produces its own rich broth!
This is an inexpensive and delicious chicken curry, which can be made with various curry pastes, like Massaman (a delicious garlicky curry) or Panang (a wonderfully spiced red curry) paste, yellow (Karee) curry, green curry, red curry, Japanese "Golden Curry" (which is relatively easy to find in most supermarkets), your favorite curry powder (which can be really inexpensive), tikka masala powder, garam masala powder, or paprika for a Hungarian paprikash!
It can be cooked in one large pot with a heavy lid. It uses the most inexpensive (and one of the best) meats I know of, chicken thighs, making it very economical. You can substitute boneless, skinless thighs for an even easier dish.
A finished huge bowl of yellow curry made with Maesri yellow (Karee) curry
paste. Oh boy, it was good.
This recipe is as much about the procedure as the recipe itself. This is now one of my favorite ways to cook chicken! You may be surprised that you don't add liquid when cooking, but the onions and peppers and chicken create their own rich sauce. You will be surprised how much liquid appears in the pot! Try this method for chicken chili, Chinese foods, Indian chicken dishes like tikka masala, chicken and dumplings, and more! Your grocery store probably sells a variety of fun and delicious "simmering sauces" you can use with this technique, too.
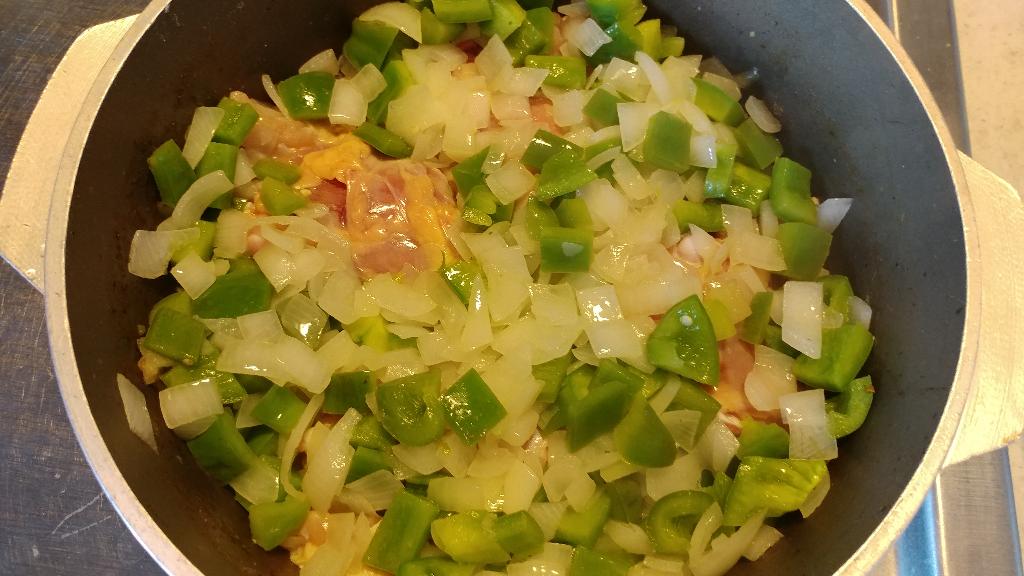
Chicken, onions and peppers before cooking. Notice that there's no
liquid added.
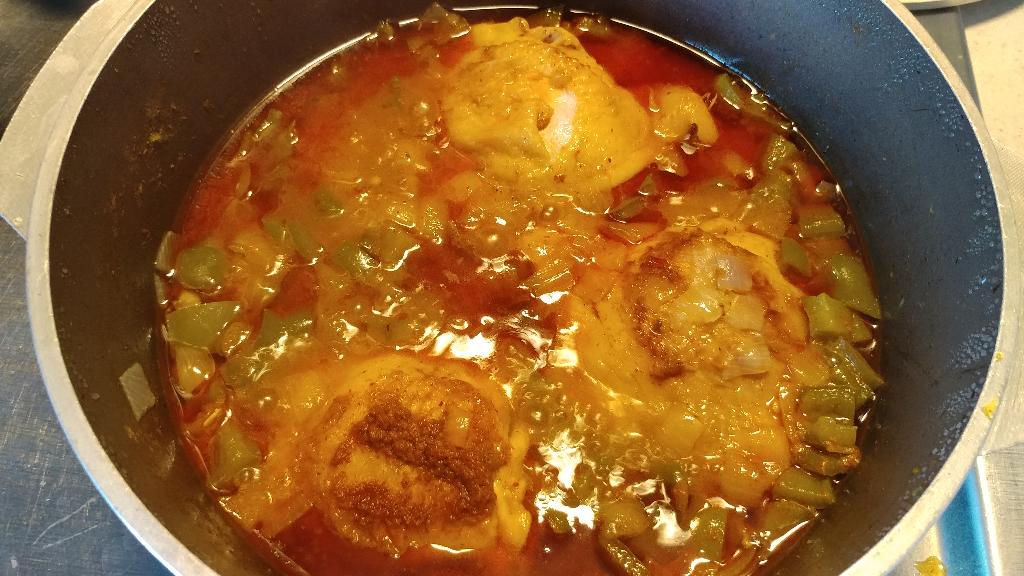
After cooking. Look how much liquid was created! All of that somehow
came from the chicken and the peppers and onions!
I love the little cans of curry pastes made by Maesri (a Thai brand.) You can find these at Asian markets (and please, visit your Asian markets) or order them online. Your local grocery store may carry other kinds of curry pastes, or you can add dry spices, or a bunch of paprika to make a chicken paprikash! The Maesri brand Masaman, Panang, and Karee (yellow) are excellent. The only one I was ambivalent about was their green curry. These 4 oz (114 g) cans are economical and a perfect size for making a batch of this curry with no waste.
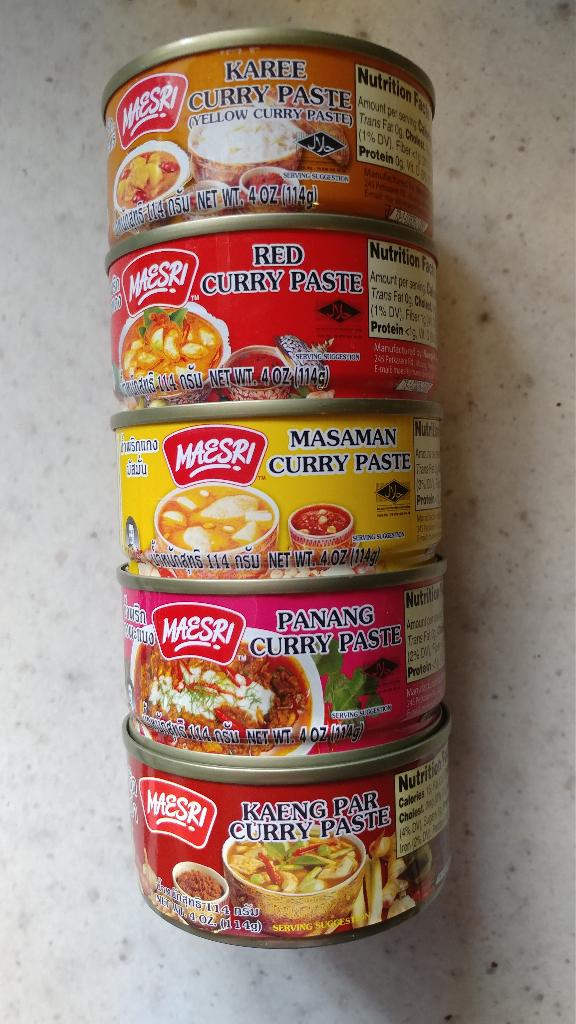
Various cans of Maesri curry pastes. I personally vouch for the
Masaman, Panang, and Karee (yellow) pastes. They are excellent. I have not
tried the Red or the Kaeng Par, nor their Sour Curry.
Maesri
actually sells 15 types of these little cans!
I bought a bunch of little cans of these curry pastes and cans of coconut milk and coconut cream and put them in all my relatives' Christmas stockings along with the recipe for this curry! That's a great gift idea! I love it that much!
If you know someone that doesn't like spicy food at all, I recommend the Masaman (also spelled Massaman). It's delicious. Did you know that CNN ranked Massaman curry as being the #1 most delicious dish in the world in a sketchy article?
(Some other brands have big tubs of curry paste that may go to waste. Some brands are screamingly hot. I once made a green curry with another brand of green curry paste (which shall go nameless because you may love it) and it was so hot that even I couldn't eat much of it. It was almost inedible. And I love hot things. I ended up diluting it with multiple cans of coconut milk.)
Cooking the chicken thighs, onions, and peppers in a covered pot, low and slow, creates its own rich broth. Using bone-in, skin-on chicken adds even more flavor. The combination of coconut milk and limes is a delicious flavor combination! Don't forget the limes or lime juice!
You might have to adjust the stove temperature to fit your stove. You start with medium-high heat to brown the chicken skin, then turn the stove to low and cook the chicken gently for 45 minutes. On my stove, you set the burner to the lowest setting. Your burner may vary.

A completed pot of chicken curry, with chicken chopped, boiled potatoes
added, and thickened with a bit of cornstarch.
The entire batch of curry and 2.25 cups of rice cost $9.95 and made 8 big meals! That's a cost of $1.24 per giant bowl!
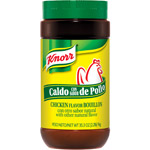 By the way, a good way to buy spices more inexpensively is to go to what
Walmart calls the "Hispanic Foods" aisle. This is especially true for
bouillon powder. Walmart sells a giant jug that they call "Knorr Hispanic
Chicken Granulated Bouillon, 35.3 oz" for $4.98. That is 2.2 pounds (1
kg), which is a lot. This is a fraction of the cost of bouillon in the
spice aisle. I use this in a lot of recipes, and it lasts me many
months. Boiling potatoes with some bouillon powder adds a lot of
flavor. I consider this one of my secret weapons. Boiling potatoes?
Bouillon powder. Cooking bok choy or cabbage or cauliflower? Bouillon
powder. Making a stew? Bouillon powder. Making a barbecue rub? Add
bouillon powder. Fish Chowder? Cook the potatoes
with some bouillon powder.
By the way, a good way to buy spices more inexpensively is to go to what
Walmart calls the "Hispanic Foods" aisle. This is especially true for
bouillon powder. Walmart sells a giant jug that they call "Knorr Hispanic
Chicken Granulated Bouillon, 35.3 oz" for $4.98. That is 2.2 pounds (1
kg), which is a lot. This is a fraction of the cost of bouillon in the
spice aisle. I use this in a lot of recipes, and it lasts me many
months. Boiling potatoes with some bouillon powder adds a lot of
flavor. I consider this one of my secret weapons. Boiling potatoes?
Bouillon powder. Cooking bok choy or cabbage or cauliflower? Bouillon
powder. Making a stew? Bouillon powder. Making a barbecue rub? Add
bouillon powder. Fish Chowder? Cook the potatoes
with some bouillon powder.
Bouillon powder can be the basis of a good and inexpensive barbecue rub. (Have you seen how expensive it is to buy a little bottle of barbecue rub that probably won't even cover your meat?) Start with about 3 parts brown sugar and 1 part bouillon powder. Then add every spice that you like from your spice drawer. Especially garlic powder, onion powder, cumin, paprika, black pepper, and a dash of red pepper. I usually make a big batch of rub and have it on hand for future recipes. I even gave big jars of it as Christmas gifts! It enhances soup stocks, makes a stew delicious, is great for cooking vegetables, is great sprinkled over meat or potatoes, and even improves cheap ramen.
I give these big jars of bouillon powder as gifts. You should too! Send them to food banks! They are miraculous and cheap and add so much to recipes.
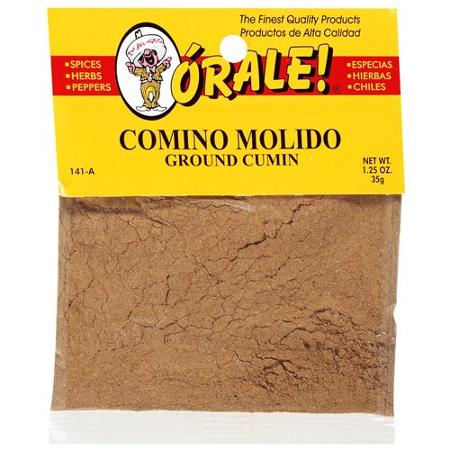 The "Hispanic Foods" aisle of your grocery store may also contain other
spices much cheaper. I usually get cumin, chili powders, and
other spices in this aisle, usually under the "Órale!" brand. These
spices come in bags instead of jars, and cost about 1/3 what they do a
couple aisles away.
The "Hispanic Foods" aisle of your grocery store may also contain other
spices much cheaper. I usually get cumin, chili powders, and
other spices in this aisle, usually under the "Órale!" brand. These
spices come in bags instead of jars, and cost about 1/3 what they do a
couple aisles away.
Another great place to buy inexpensive spices in bulk is Indian markets. These often have big bags of spices like cardamom, cumin, coriander, cinnamon, mustard seeds, sesame seeds, and a wide variety of chili powders for drastically lower prices than you can find them elsewhere.
Preserving perishable vegetables is a time-honored skill around the world. One of the easiest and most delicious way of preserving is fermentation. Fermentation is a natural process by which you allow naturally-occuring bacteria, or yeast, or other microorganisms like koji (a filamentous fungus or mold which makes delicious things like soy sauce or sake) to alter and preserve your food.
In Korea, preserving cabbage for the winter has been an annual affair for centuries. It was not uncommon for a household to preserve 200 heads of cabbage every year, making delicious kimchi! The excellent cooking show Kimchi Chronicles claimed that most Korean people eat some kimchi with every meal! It's nutritious, preserves vegetables for a long time, even at room temperature, and is a natural probiotic, full of helpful bacteria that aid in digestion! And it's delicious and refreshing!
(I just made myself hungry and went and got a bowl of cold, crisp kimchi from my refrigerator. It's so refreshing and delicious!)
Kimchi varies from the very simple to the complex, from mild and refreshing to extremely sour, from crisp and light to leathery, from soaking in a salty brine to being almost dry, from unspiced to fiery hot. The process can range from simple to extremely labor-intensive.
My process for making kimchi has gotten simpler over the years. Many recipes call for multiple stages of salting and rinsing, and lots of ingredients. I'm going to share my very simple recipe and process for making a crisp, refreshing kimchi.
The process of fermenting kimchi can be surprisingly simple. You need Napa Cabbage, salt, spices, a large bowl, some jars, and, ideally, a kitchen scale. Nature does most of the work for you.
Kimchi fermentation happens almost magically. Lactic acid bacteria (often abbreviated LAB) that occur naturally on the cabbage and in the air will almost always start the fermentation for you naturally! All you have to do is provide the cabbage, the salt, and appropriate conditions.
Many processes for making kimchi require salting the kimchi to a high level (like 11% salt), waiting for a few days, rinsing the kimchi, and then salting again to a lower level. While this may make good styles of kimchi, it becomes impossible to know what amount of salt is going to be in the remaining product, and it requires more work. My process uses the right amount of salt the first time, for repeatable and measurable results.
Studies have shown that lactic acid bacteria tend to grow best at a salt concentration of 2.7% by mass. I usually shoot for 3% salt by mass as I find that very tasty. In fact, a group of Korean researchers found that "tests show that the best taste is attained after 3 days of fermentation at 20 °C (68 °F) with 3 percent salt."
The most foolproof way to make this is to have a kitchen scale. You will weigh the Napa cabbage, weigh out salt, weigh the water you add, and weigh some more salt. Again, I shoot for 3% salt by mass: the salt is 3% of the mass of the cabbage and the water you add.
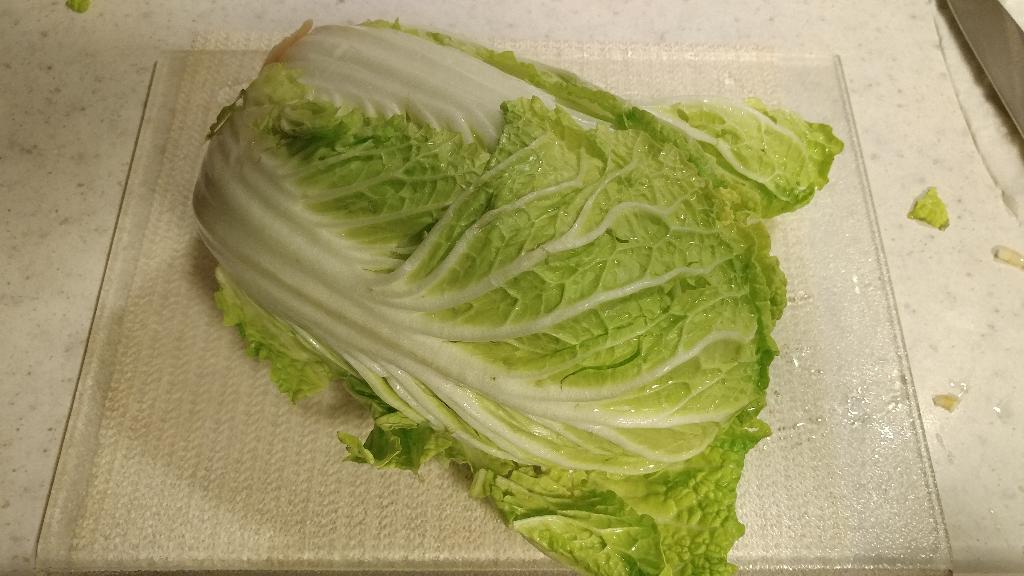
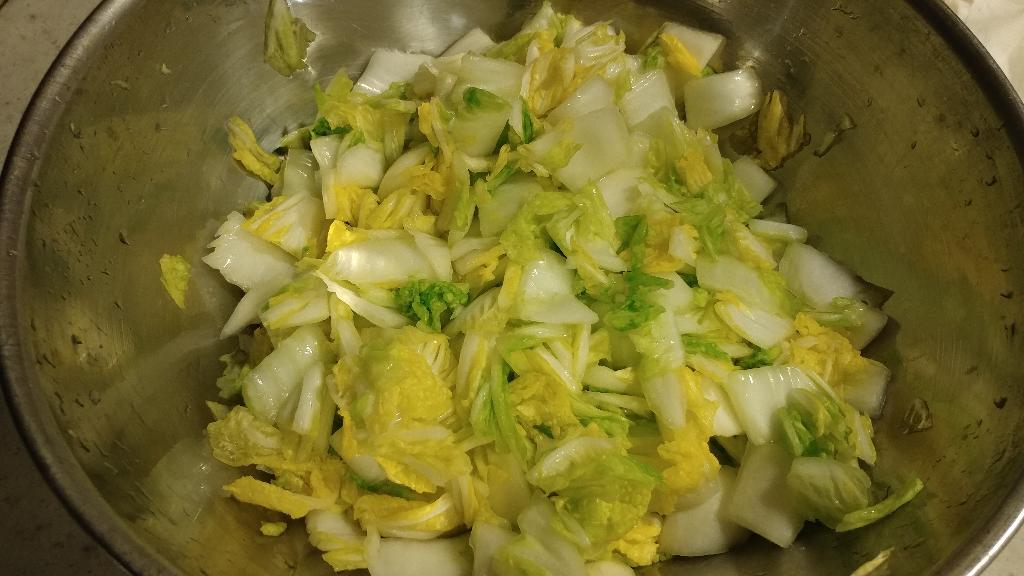
Some beautiful Napa cabbage before salting. Note how full it fills
that giant bowl.
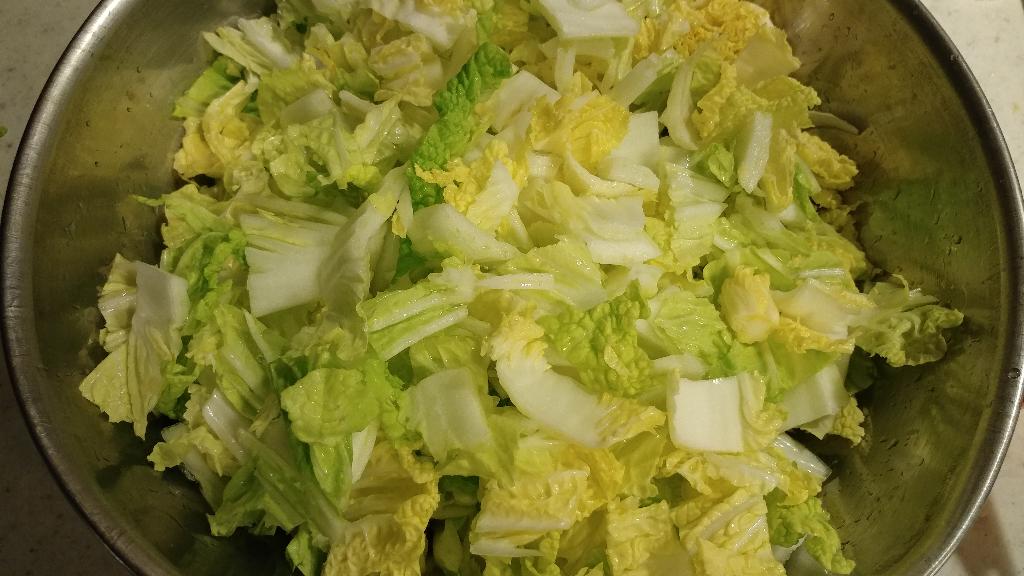
Look how much it shrunk!
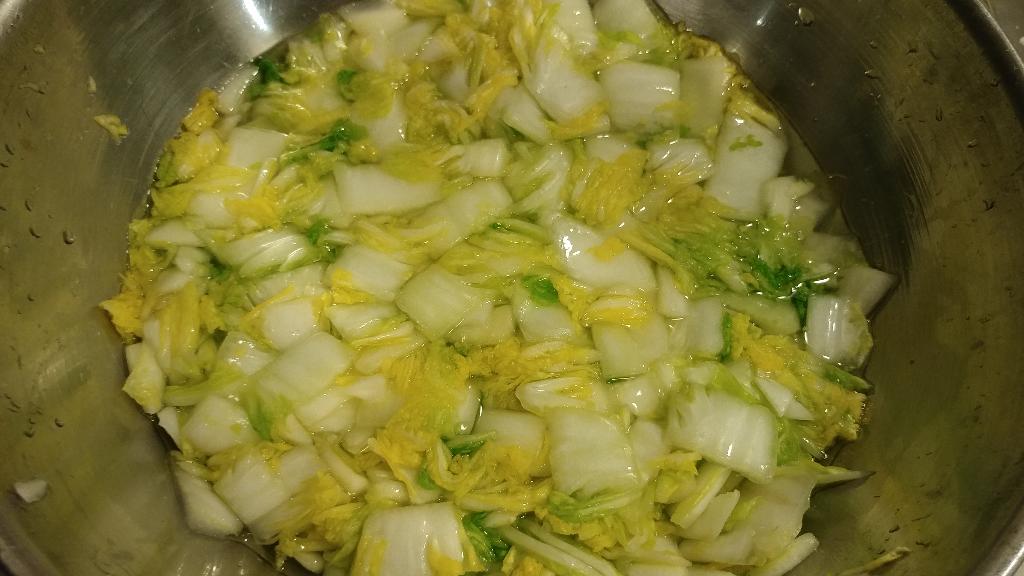
A zoomed-in version of the cabbge pressed into the bottom of the bowl
and barely covered with water. This is probably what yours should look
like.
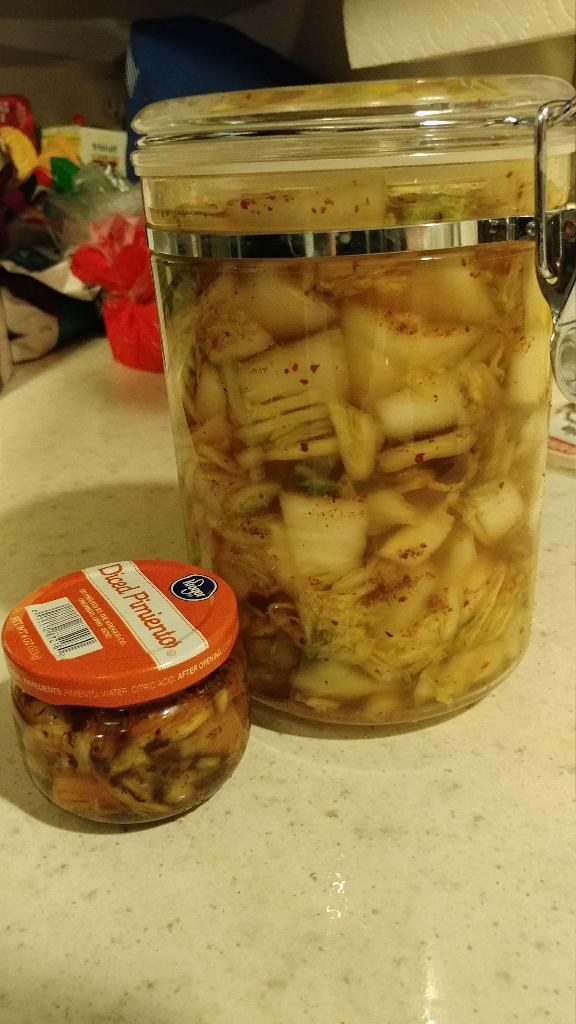
What lightly-spiced Kimchi should look like. The little jar has a
whole dried Bhut Jolokia ghost pepper in it! That is one of the hottest
peppers ever known, and is over 1 million Scoville units. I am afraid
of it.
Maybe you've seen some confused statistic that says that there are 10 bacterial cells in the human body for 1 human cell. That's probably wrong, according to modern science. The ratio is probably closer to 1:1. There are probably about as many bacteria in a human body as there are human cells. And these bacteria, mostly in the colon (large intestine), are crucial to your ability to digest food! Bacteria can be really small, though, so the total mass of bacteria in the body is only about 0.2 kg.
Any time you see ground beef on sale, think of my secret weapon: Cabbage Burgers! These are also variously known as "Krautburgers" (although that gives the incorrect impression that there's sauerkraut inside; it's just cooked unfermented cabbage,) or known as "Cabbage Rolls" or "Runza" or "The Best Food You Can Prepare in Advance and Freeze." They're a bun filled with cabbage, onions, and ground beef. They're delicious, nutritious, filling, inexpensive, and they freeze and microwave incredibly well, so you can make a giant batch and have cheap food ready in minutes!

I usually make a gigantic batch of these little delights, using 4 pounds of ground chuck, 2 heads of cabbage, 5-6 onions, 12 cups of flour, 12 egg yolks (which left me 12 egg whites for breakfast for 4 days) and a few other ingredients. It is a huge undertaking, but my last batch produced 70 delicious krautburgers that went into the freezer and should provide dozens of quick, delicious meals! Each krautburger cost, by my estimate, about $0.41, and two of them make a good meal for only about $0.82! I've learned that making a huge batch will last for weeks or months, and is as easy as making a smaller batch.
I made a batch of these for my friend who was having medical issues and froze them in her freezer. (It made 43 cabbage burgers, but it wasn't my best batch. I added kale and arugula and eliminated onions for dietary issues. Also I used some rye flour because of mild food allergies which made the perfect breading non-perfect) She later said "they saved my life." And, honestly, when I'm completely out of energy, warming up and eating these cabbage rolls makes me so happy. They are the best freezer food I know how to make.
They are the perfect freezer food. I know of nothing better to make and freeze. They are the perfect food, and they are delicious. Try these. They are so easy to microwave and reheat. I give them to friends, and my friends were so happy to have them. It's fun (and very efficient) to make a giant batch of them with friends.
(Unless a friend accidentally turns the oven to "self-clean" mode while you are making them and you have to spend several hours figuring out how to unlock the oven solenoid before it frees itself in 12 hours because of the searing heat from self-clean mode. But that's a story for later.)
Add your own flair! (Cheese, ricotta, jalapeños, taco spices, paprika, whatever!)
This recipe is for a single batch but you should always plan on making at least a quadruple batch because they freeze extremely well, and it's just as easy to make a large batch. I almost always make a quadruple batch because 2 heads of cabbage comes out even. A single batch will make about 15 krautburgers.
Notes about the breading: This is a high-performance, stretchy,
load-bearing dough. You may be tempted to replace the wheat flour with
some other kind of flour (e.g. spelt or rye). This has never gone
well in my (and others') experience. At the proportions below, the dough
needs to be stretched very thin and still hold together. Please
resist the urge to make it with different ingredients until you've had the
real thing. If you are going to make it with other types of flour, the
dough will have to be much thicker to stay together, and you'll have to
make much more of it. As it is, this amount of breading is
Sprinkle the yeast into 1/2 cup of the milk. Add the sugar and salt and stir until dissolved (actually it will stay clumpy because of the milk. Just let it sit for a while and it will unclump.) Place the mixture in a warm draft-free place for 5 to 8 minutes or until the mixture has begun to bubble. (It may take longer than that.)
Pour the flour into a large bowl and make a well in the center. Drop in the yeast mixture, egg yolks, remaining 1/2 cup of milk, and butter, and with a large wooden spoon, gradually stir the flour into the other ingredients until a fairly firm dough is formed. Cover the bowl and let rise in a warm place for an hour. (Over a bowl of warm water is good.) Punch down, let rise for another 45 minutes.
Preheat the oven to 375°F (190°C).
In a large pot with a lid, heat oil and cook onions with some salt for 5 minutes. Add cabbage, some salt and pepper (or bouillon powder for even more flavor,) and about 1/2" of water, cover pot and steam until cabbage is tender, stirring occasionally. Add small amounts of water if necessary while cooking. A little bit of onion and cabbage juice left in is good!
Lightly brown ground beef with garlic and do not drain. Mix beef with cooked cabbage and onions and season to taste. The filling will be easier to work with and less wet if cooled somewhat before using.
Cut dough into manageable sections and roll out on lightly floured surface (or unfloured on a dough sheet.) Roll thin using rolling pin. Cut dough into pieces (whatever size you like, about 4" square is good). Roll out again with a rolling pin for efficient use of your dough! Fill with a couple heaping spoonfuls of filling. Fold corners of dough together, pinch closed (I find 8 to 10 little pinches is good), and turn over with seam down on cookie sheet. Bake in oven for 10-12 minutes or until golden. Cool on rack. Can freeze after cooled. These reheat very nicely in the microwave.
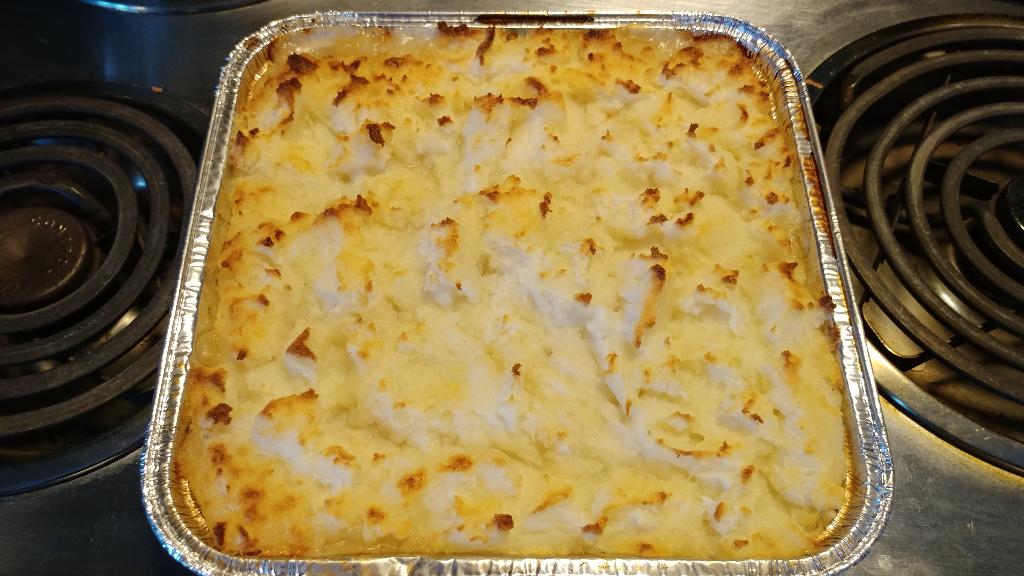
A cottage pie made with leftover cabbage roll filling (24 oz! and I
made two of those!) topped with boxed mashed potato filling. Roll your
breading thinner and you will have less leftovers.
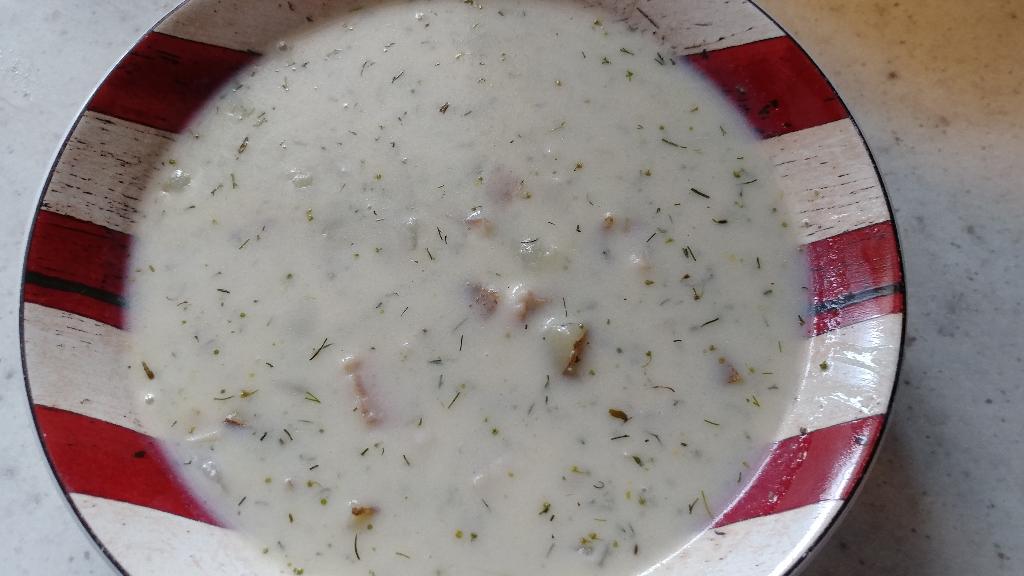
On a Friday during Lent, I had two smallish pieces of tilapia (6.6 ounces) left over from the week before. It wasn't enough for meals, so I decided to stretch it by making fish chowder! I'd never made fish chowder before, but it was simple and so good I made it the next week too!
Fish can be pretty expensive, especially if you're eating on $2.50 a day. The cheapest fish I could find in my grocery store was frozen tilapia at $3.99 / pound. Other fish like frozen cod and salmon were $5 / pound. While eating for $2.50 a day another year, I got a bag of frozen Pacific Whiting for $2.80 / pound and made fish tacos. But, boy, that was the fishiest-tasting fish I ever did eat. I wouldn't try it again. The best fish deal I've found was the whole Surprise Salmon that I found at Albertson's for $1.99 / pound (before they closed, sigh. They had the best sales.)
The fish chowder turns a little bit of fish into a satisfying meal. It has milk and potatoes, which are very inexpensive. I had very inexpensive butter that I bought for $1.99 / pound so I added about 5 tablespoons of butter for richness.
The recipe makes enough for 8 bowls of chowder, for a total cost of $3.28, with each bowl costing about $0.41. I had two bowls with each meal and was quite satisfied! And it's delicious!
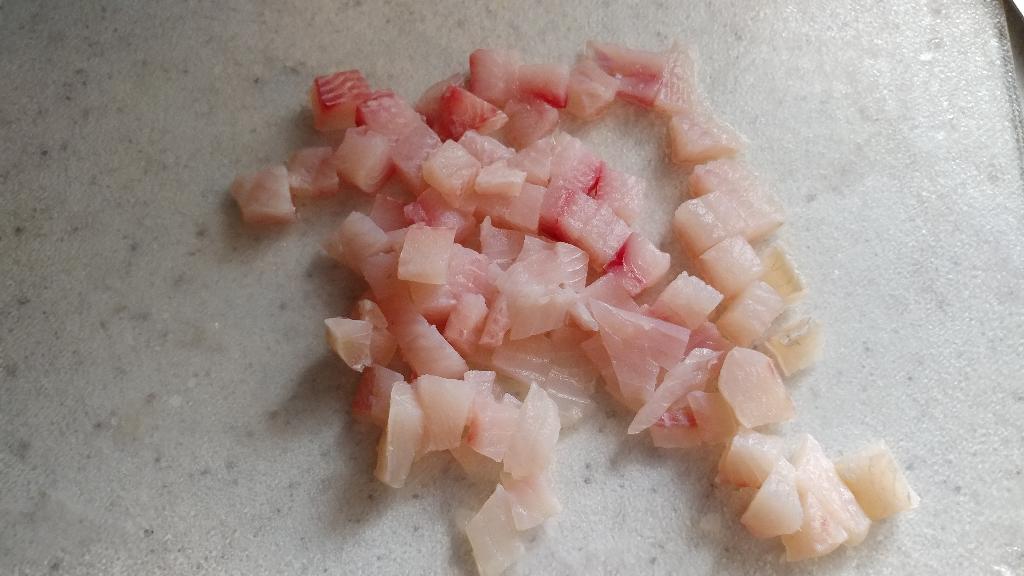
Some chunks of nice tilapia. Tilapia was really good in this!
| Item | Cost |
|---|---|
| 6.6 oz tilapia at $3.99/lb | $1.65 |
| 1/2 medium onion | $0.30 |
| 1.5 pounds Russet potatoes at $0.40/lb | $0.60 |
| 5 tablespoons butter at $1.99/lb | $0.31 |
| 2 cups milk at $2.39 / gallon | $0.30 |
| Dried dill, 1 teaspoon | $0.10 |
| Vegetable oil | $0.02 |
| Total | $3.28 |
| Total, 1 bowl | $0.41 |
Your grocery store may have a phone app that you can use to get special deals like "digital-only" coupons, rewards for purchases, and random free foods. I've become a big fan of the Safeway app which has saved me a lot of money.
For example, on my last shopping trip, there was a reward in the app that gave me $20 off my order if I spent more than $100. And it gave me free eggs and free cheese.
The app also rewards purchases by giving you "rewards points" that can be redeemed for lower gas prices, free food items, or dollars off your orders. The most efficient rewards I've seen in the app are the occasional $7 off meat purchases for renewing 4 rewards. (4 rewards normally just gives $5 off.) I have used this to indulge and buy some meats that would usually be above my $2.50 / day budget. For example, I bought a pork loin that weighed about 4 pounds for only $0.66, cut it into 3 pieces and froze it, so I can have delicious roasts that each cost only $0.22!
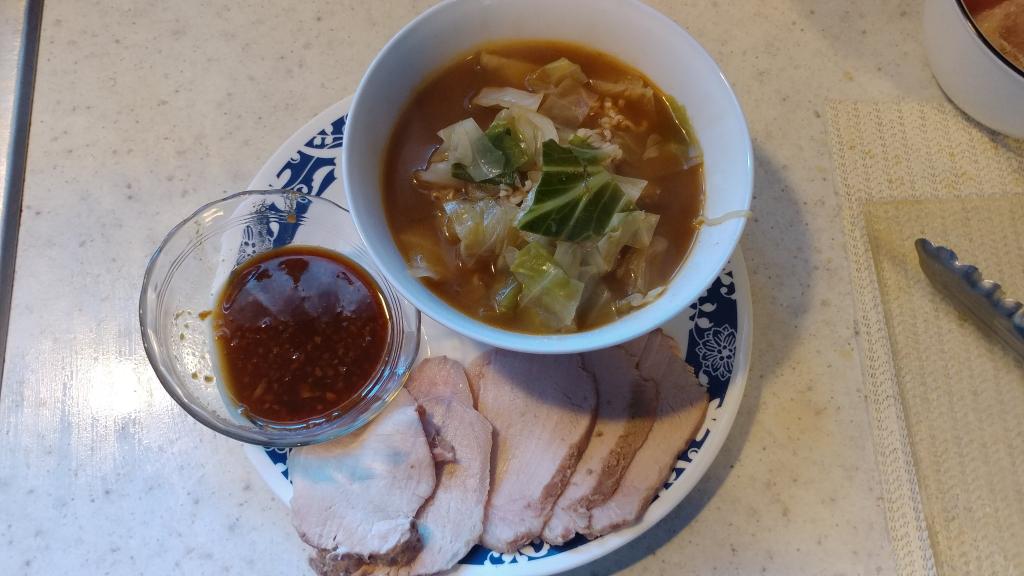
A dinner using that pork loin. The pork loin was cooked for 16 hours at
141°F (60.5 °C) in my homemade sous vide
cooker. For one plate, the pork cost less than $0.11, ramen cost $0.10,
cabbage cost less than $0.10, and various spices and my orange-ginger sauce
cost about $0.10. So about $0.40 for that whole plate! And it was some of
the tenderest meat you will ever encounter!
I'm security-paranoid, so as soon as I downloaded the app, I went into Android's settings and revoked all of its permissions. It still works fine.
So, if I'm security-paranoid, why do I use an app? My rationale is that the grocery store has tracked everything I've purchased everytime I use my customer loyalty card for the last few decades. It has been economically worth it to get weekly sales, though. And I'm happy that the Safeway app works fine with all app permissions revoked.
App tips:
From watching grocery store sales over the past years, I knew that around St. Patrick's Day, a few things would be on deep sale: cabbage, corned beef, and potatoes. Around this time, they're the cheapest they'll be all year, so I got some of each.
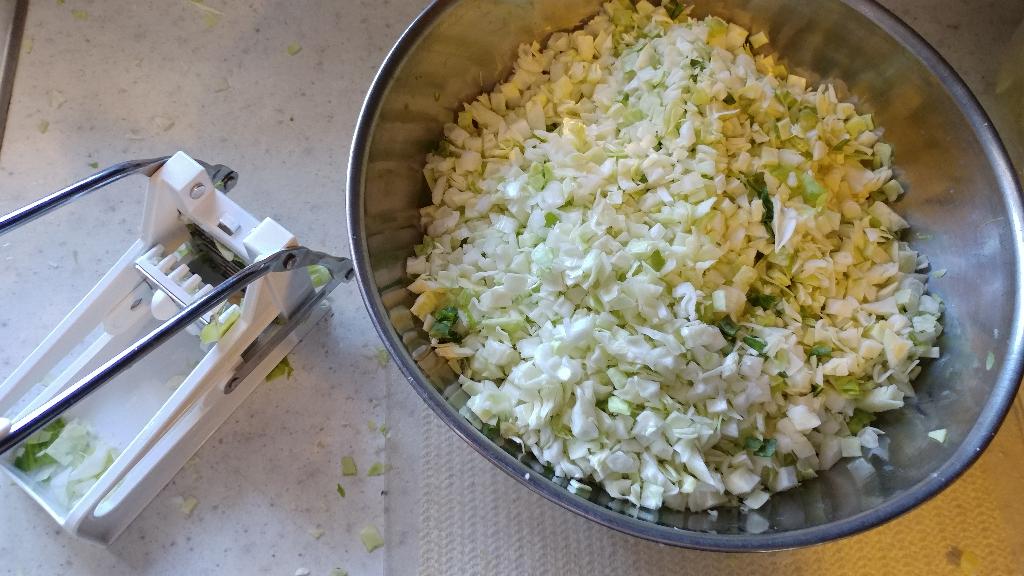
Cabbage was on sale at the remarkably low price of $0.28 / pound, so I picked out a beautiful huge head of cabbage that weighed 5 pounds!

Can you identify the crust, mantle and core?
That's a lot of cabbage. I cooked some with ramen and pork loin, (see the picture above!) but still had more than 4 pounds left over. How do you preserve that much cabbage? I had considered making a huge batch of Colcannon which is mashed potatoes and cabbage, but then remembered a simple dish that's mostly cabbage--okonomiyaki!
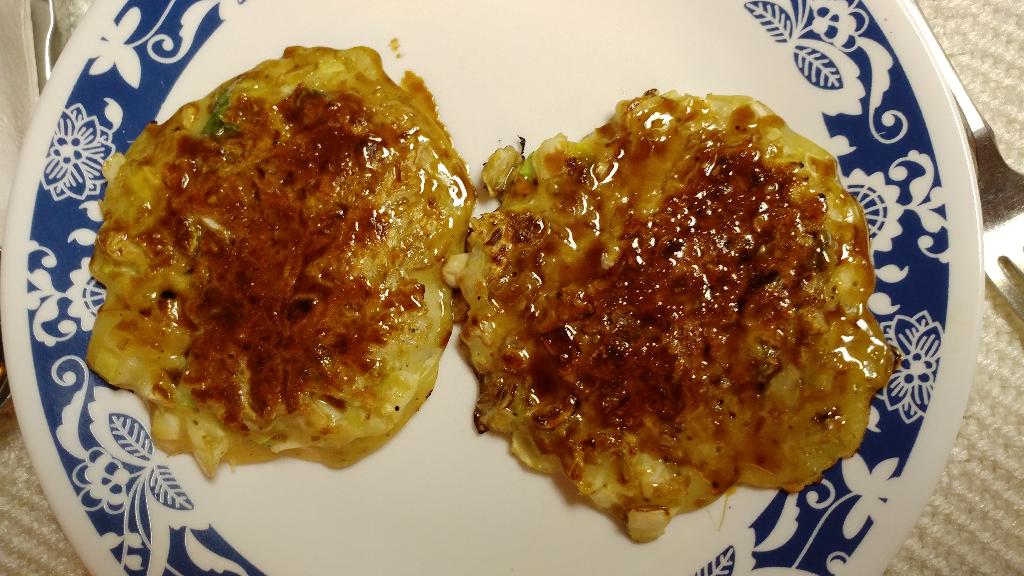
Finished okonomiyaki dressed with sweet soy sauce
Okonomiyaki is a Japanese dish that's basically a savory, not sweet, pancake of shredded cabbage held together by flour and eggs, (and whatever else you want) that's cooked on a grill. The name "okonomiyaki" basically translates to the English phrase "as you like it," which means that you are free to make okonomiyaki any way that you please! Some recipes add meat, or fish, or shrimp, various spices or whatever's on hand.
The grilled okonomiyaki are then usually topped with a sweet and savory sauce (apparently okonomiyaki sauces are readily available in all Japanese market, but my huge local Asian Market didn't have any when I was there a few months earlier.) Instead, I used a big bottle of sweet soy sauce that I had, which is syrupy and good. You can also use a sweet chili sauce, teriyaki sauce, a mix of ketchup and Worcestershire sauce (which supposedly tastes a lot like okonomiyaki sauce,) some soy sauce cooked with sugar, sriracha, or anything else you like! They're often drizzled with mayonnaise and dried bonito fish flakes before serving.
And, since okonomiyaki freeze and microwave so well, I decided to make a giant batch of them and freeze them to preserve cabbage for many meals!
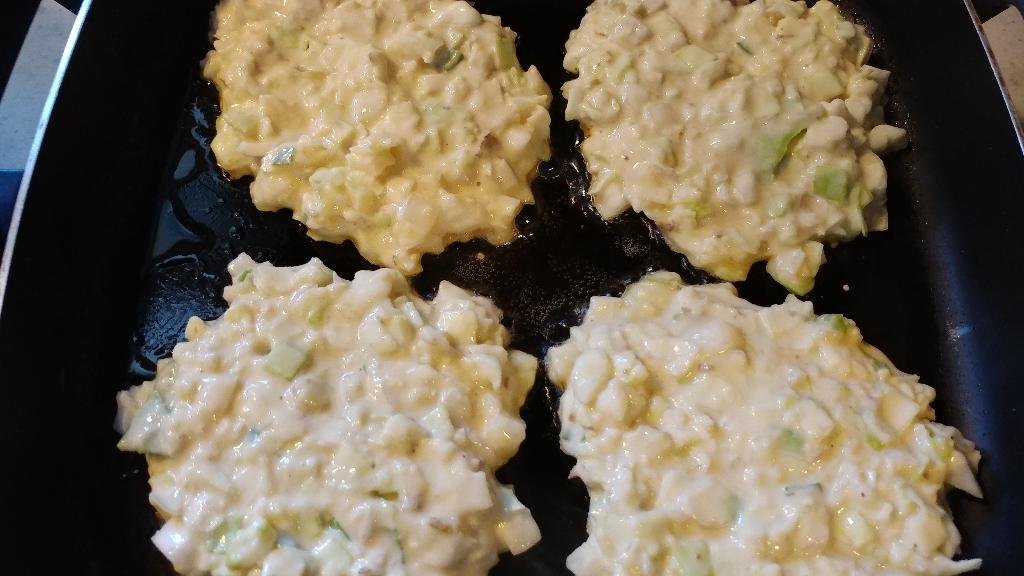
Often, okonomiyaki are quite big--the size of a plate--but I decided to make them smaller (about 4 inches (10 cm) diameter) so I would be more likely to grab one and supplement a meal.
These are a great, economical replacement for pre-made veggie burgers! And you can spice them the way you like. Curry powder was really good in some of them!
I made a huge batch with over 4 pounds of cabbage. This made 37 okonomiyaki! I froze most of these. They microwave really well! That's a lot of side-dishes or meals!
The amazing thing is that since I had free flour (I got a giant bag of good flour as a Christmas present) and some free eggs (from using the app,) this giant batch cost me about $2.00 to make! Each patty cost less than $0.06! That's 6 cents! Wow!


I live at an elevation of about 5500 feet (1676 m) above sea level. For me, many recipes have to be modified because the air pressure is about 18% lower than at sea level. Instead of water boiling at the sea-level temperature of about 212°F (100°C), it boils at about 202.2°F (94.5°C)!
That lower boiling point is significant when boiling almost anything from eggs to pasta to split peas to beans. Sometimes cooking times are doubled or worse. In the past, I've soaked dried beans overnight and boiled them all day and they are still hard!
When water boils, the water molecules that are at a higher temperature than the boiling point tend to escape from the surface of the water as steam. This means that the water can't get significantly hotter than that boiling point.
(In more technical terms, the boiling point can be calculated as when the saturation vapor pressure is equal to the ambient air pressure.)
A pressure cooker is a vessel that contains the water and the steam (vapor) under pressure. This allows the water to reach a significantly hotter temperature than in an open pot. How much hotter? Well, my programming language Frink recently added a high-accuracy library for the properties of water and it can easily calculate boiling points at different atmospheric pressures and inside a pressure cooker.
One of the trickier parts of this process is to find your actual local atmospheric pressure. When you look on most weather sites, they give you a corrected atmospheric pressure which is what your local atmospheric pressure would be at sea level. For example, around my altitude, the true atmospheric pressure is about 0.822 atmospheres, while the weather sites list the corrected pressure as being about 1.000 atmospheres.
You can find the boiling point temperature at local atmospheric pressure and inside a pressure cooker using the following:
    use water.frink

    // My local pressure

    p = 0.822 atmosphere

    t1 = Water.boilingPoint[p]

    println["Boiling point is normally " + (t1 -> F) + " F (" + (t1->C) + " C)"]


    // Pressure in a pressure cooker at 15 psi over ambient pressure

    t2 = Water.boilingPoint[p + 15 psi]

    println["Boiling point in pressure cooker is " + (t2 -> F) + " F (" + (t2->C) + " C)"]
    Boiling point is normally 202.23 F (94.57 C)

    Boiling point in pressure cooker is 244.49 F (118.05 C)
Note that the boiling point temperature in a pressure cooker is significantly higher than at ambient pressure!
There are a few ways to find your "true" local atmospheric pressure:
StandardAtmosphere.stationPressure which
lets you turn a "corrected" sea-level pressure into a local pressure at a
specified altitude:
use StandardAtmosphere.frink

    seaLevelPressure = 1013 millibars

    station = StandardAtmosphere.stationPressure[5500 feet, seaLevelPressure]

    println["True station pressure is " + format[station, "millibars",
                                                                     2]]
True station pressure is 827.26 millibars
      ss = getSensorService[staticJava["android.hardware.Sensor", "TYPE_PRESSURE"]]

      p = ss.waitForValues[]

      println[p@0 + " millibars"]
828.9995 millibars
The richest and cheapest soup I know how to make is split pea soup.
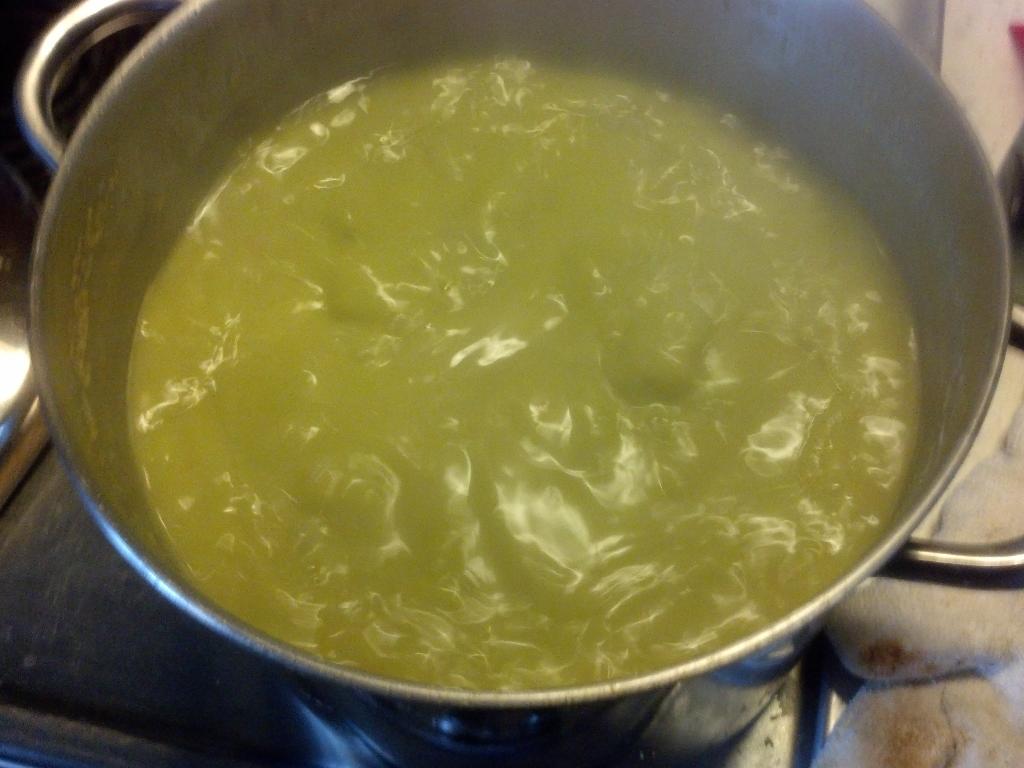
Here is the basic ingredient list for a gigantic pot of split pea soup. (The recipe actually comes from the back of a package of Hurst's HamPeas.) I didn't use their peas, (sorry, guys) but they come with a little packet of artificial ham flavor. You will need a huge stockpot.
Bring the water to a boil, and add the rest of the ingredients, cover, and boil until the peas are broken down. (Your boiling time will be different than mine as I live at an altitude of over 5600 feet, so water boils at the lower temperature of 204°F (95°C), and boiling dry beans and peas and pasta takes significantly longer.) You will need to boil it for at least an hour. For me, it takes at least an hour and a half, and usually 2 hours. Stir constantly. See below.
Tip and Warning 1: Based on a suggestion from the people at Cook's Illustrated, baking soda can help reduce cooking times for beans and lentils by helping to break down the skins. I added the baking soda early in the process, and it immediately started to make the soup foam, which progressively got worse until it boiled over and I had to lift it off the heat. Ugh. I too-late tried the home-beer-brewer's trick of spraying the foam with a sprayer bottle of water, but the foam was too active and I was too late. Be prepared for boilover. Luckily, after the protein foam boils off or is skimmed off, you're okay for the rest of the boil.
Tip and Warning 2: Keep stirring! And keep boiling! While the recipe on the HamPeas bag tells you to reduce the heat and simmer after 30 minutes, I have found that unless you keep up the convection of an actively rolling boil, your soup tends to stick to the bottom of the pan and burn. I burned a giant batch of this soup last year while doing this experiment. That was not fun. You need to stir it constantly for up to 2 hours. (I'll note that adding some peanut butter to the soup reduced the burnt flavor.)
Thanks for reading this. I hope I helped someone find a new food that they love, and can share with others. I will be adding to this page as I discover new inexpensive, amazing recipes. If you have a favorite inexpensive recipe that you'd like to share, please email me.